JIRA Integration
Panoptica's Jira integration enables you to create Jira tickets directly from various Panoptica modules, such as Attack Path Analysis, Vulnerability Management, Security Posture, Root Cause Analysis, and Code Security .
You can integrate and configure multiple Jira projects in Panoptica's settings. When creating a Jira ticket from Panoptica, you have the option of creating it in any of the Jira projects that have been integrated.
Prerequisites and Preparation
- Define a default reporter with permission to create tickets in every Jira project you plan to integrate with Panoptica. Due to personal data considerations, Jira does not allow pulling the list of Jira users. Any tickets created via Panoptica will be assigned to the default project assignee.
- Create an API token for your Atlassian account to be used for the integration.
See Manage API tokens for your Atlassian account for details.
Integration Steps
The Jira integration is configured via the Settings tab in Panoptica's console UI.
- Click Settings in Panoptica's main navigation pane, then select Integrations.
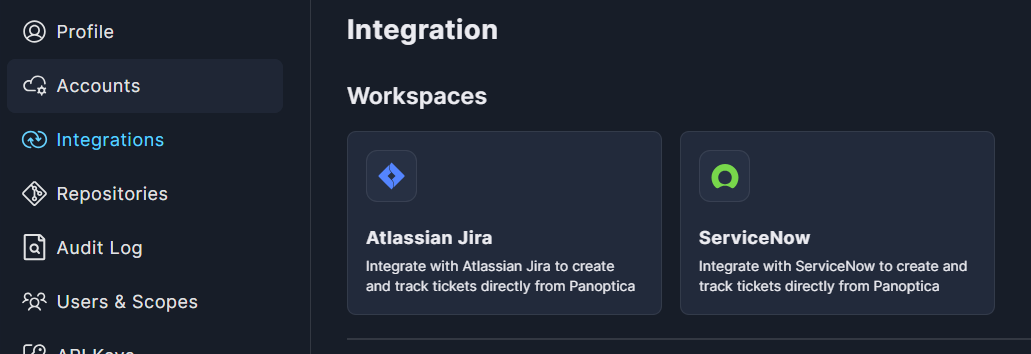
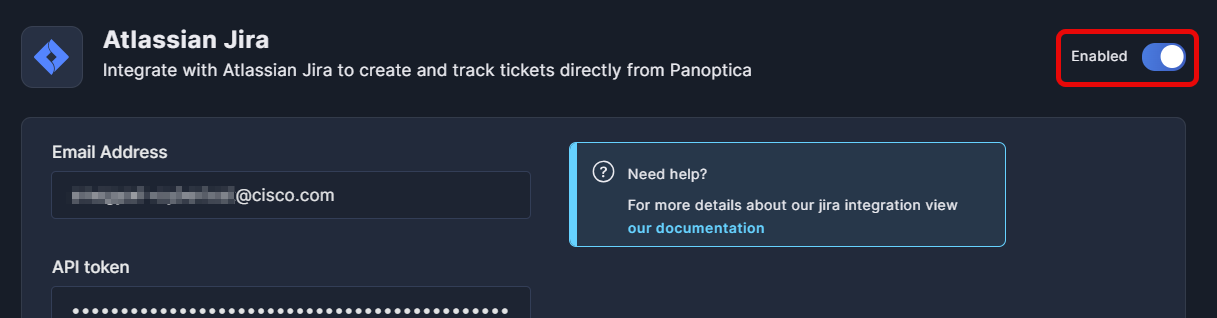
- Under Workspaces, click Atlassian Jira to open the configuration screen:
-
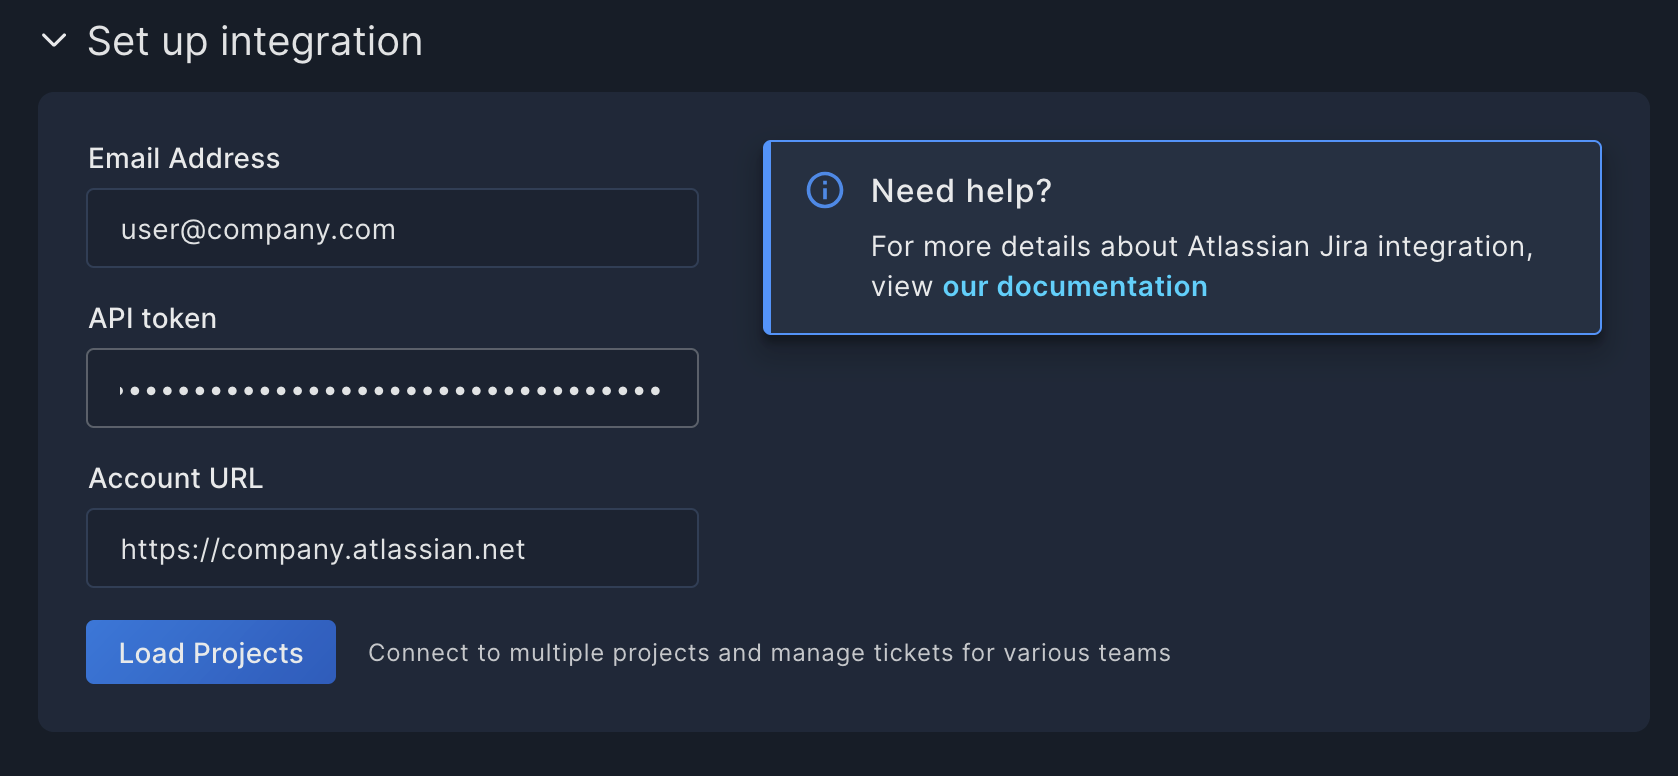
In the Email Address field, enter the email address of the default assignee for your Jira tickets (or an Admin user). Note that the default assignee must have Create Jira Ticket permissions in every project you'll be integrating with Panoptica.
-
Enter the Atlassian API token you created earlier in the API token field.
-
In the Account URL field, fill in the domain of your Jira projects.
-
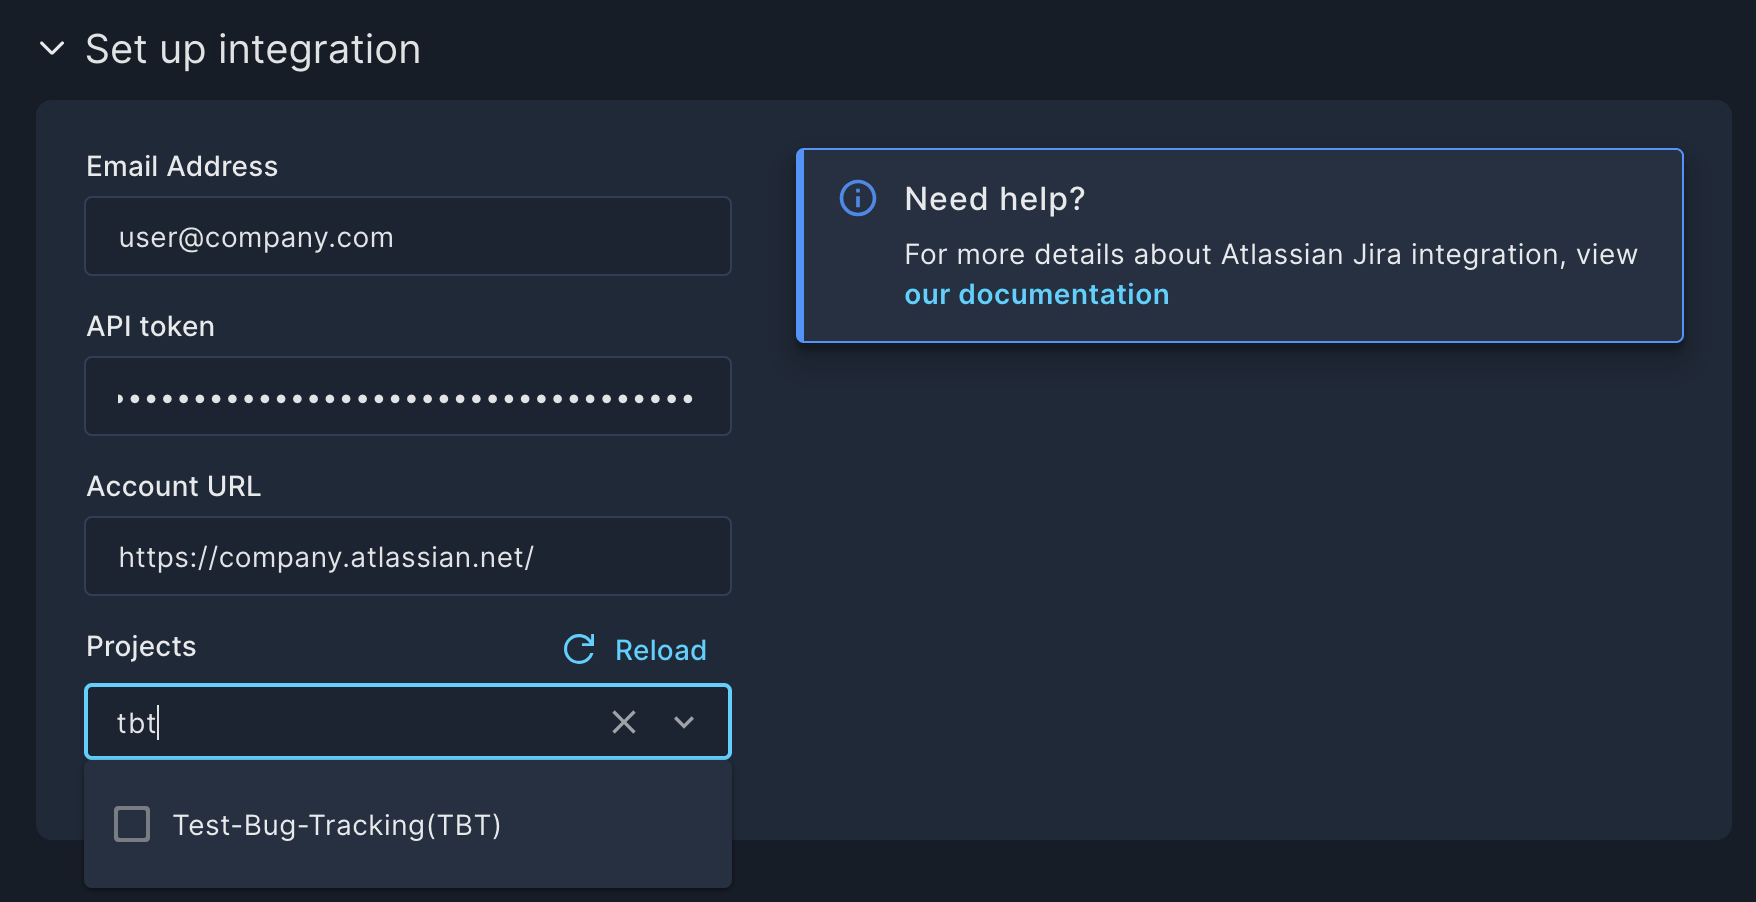
Click Load Projects to retrieve the list of projects in your Atlassian domain. A new Projects field will appear, from which you can select the projects and issue types.
-
Click the Projects field to open a list of all the projects in your Jira domain.
-
Select the project you wish to integrate, and a list of issue types available for that project will appear: Bug, Story, Task, etc.
-
Select the default issue type, and the project will be added to the Projects field.
-
Panoptica automatically identifies the mandatory fields defined for the project. Define the default values for the mandatory fields if needed. See Mandatory Fields below for more details.
-
Repeat this process for every project you wish to add to Panoptica.
-
The first project selected will be the default Favorite. You can set another project as Favorite by clicking the star to Set project as default
-
-
Click Save.
Mandatory Fields
When integrating a Jira project to Panoptica, it automatically detects the mandatory fields required by the issue type and the project to create new tickets.
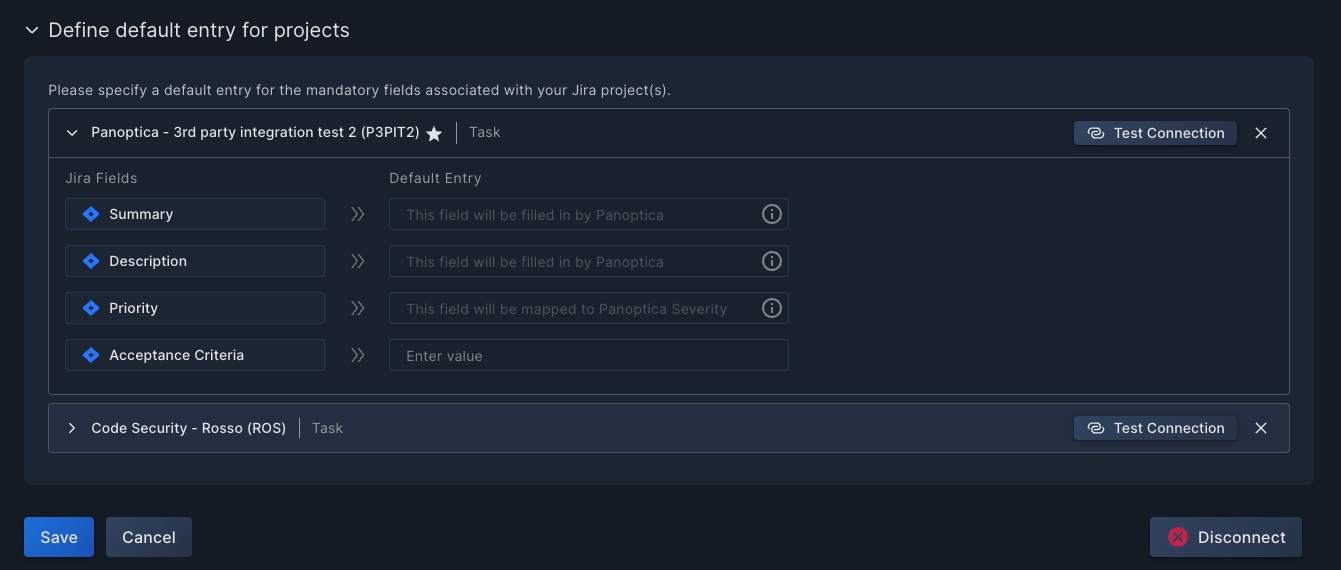
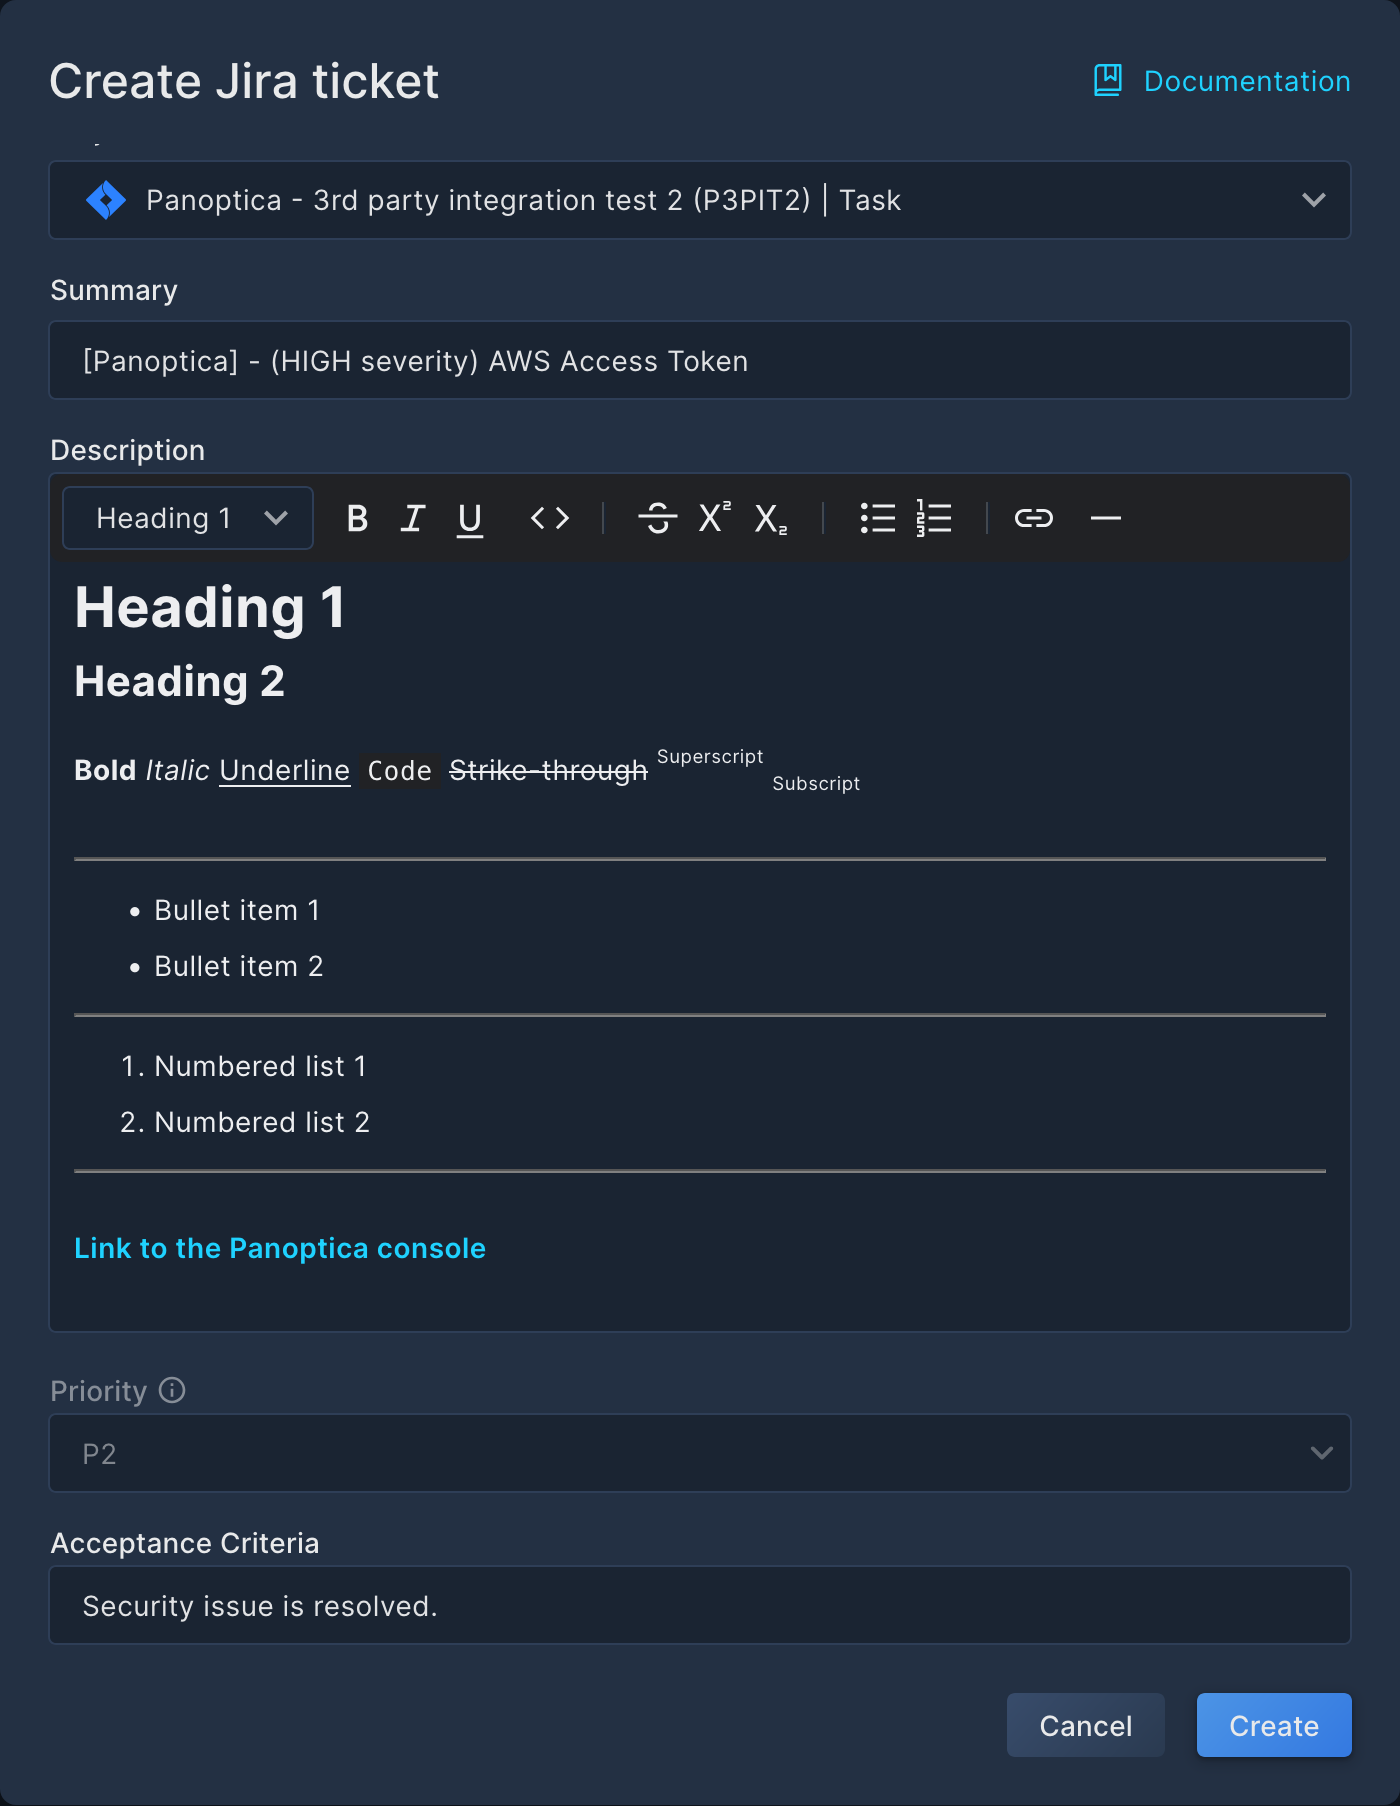
The Summary, Description, and Priority fields are always shown and their default entries are provided by Panoptica. The priorities assigned by Panoptica depend on the number of priorities configured for the Jira project. Other mandatory fields for the project and issue type are also displayed.
You can configure the default entries for any fields not automatically filled in by Panoptica. Providing a default entry is not required. If a default entry is not provided, the ticket creator needs to provide an entry during ticket creation.
The following custom Jira field types are supported:
- Date and time pickers
- Number fields
- Select list with single or multiple choices
- Text and text area fields
- URLs
To define a custom default entry:
- Select the project you want to configure.
- Review the mandatory Jira fields for the project and issue type, and fill in any missing default entries.
- Click Test Connection to create a test ticket in the current project that you are configuring. Check your Jira account to make sure the ticket was created successfully.
Note
You must provide a default entry for all fields where a default entry is not automatically provided by Panoptica for the connection test to succeed.
- Repeat this process as needed.
- Click Save for the new configuration to be applied.
When a Jira ticket is created through Panoptica, the mandatory fields are populated with the default entries. The user creating the ticket is able to edit most of the fields already filled in by Panoptica or default entries. All mandatory fields must be populated to create the ticket. In the Description field, rich text editing is supported.
The ticket's Priority is automatically assigned by Panoptica based on the severity of the finding the ticket is created for. Hovering over the information button reveals how the Panoptica severities are translated into Jira priorities.
Enable/Disable
If you would like to suspend the Jira integration, without deleting the configuration, browse back into the Atlassian Jira configuration screen and click the Enable radio button to disable the integration.
Panoptica will still maintain links to any existing tickets if the integration is disabled, but you will not be able to create new tickets from Panoptica modules. To resume the integration, simply return to the Atlassian Jira screen and Enable it.
Updated 10 months ago