Set up Guide for Attack Surface Discovery
Evaluate the risks by understanding the attack surface of your multi-cloud environment.
# 1. Add and scan domain assets
Scanning domain assets allows you to identify vulnerabilities such as open ports, outdated software, or misconfigured servers and assess risk by reviewing how much of the cloud environment the attacker can access. Add and scan your domain to ensure security and compliance across your cloud environment.
How-to:
- Scroll to the cloud asset table and select "Add Domain"
- Paste the domain URL
- Click "Save Changes"
- Review how much about the domain assets the attacker can see

Fig 1. Add a domain
# 2 Review the domain assets in a specific region
Filter by the specific region to review the domain assets that are registered or hosted there. It might be useful to filter by location to review location-specific compliance or distribute security team efforts.
How-to:
- Scroll down to "Filter" > Select "Region"
- Review the table of the domains assets hosted in the region
- Click on the arrow bar to review detailed information such as full details, name, CNAME, IP address, service, confidence level
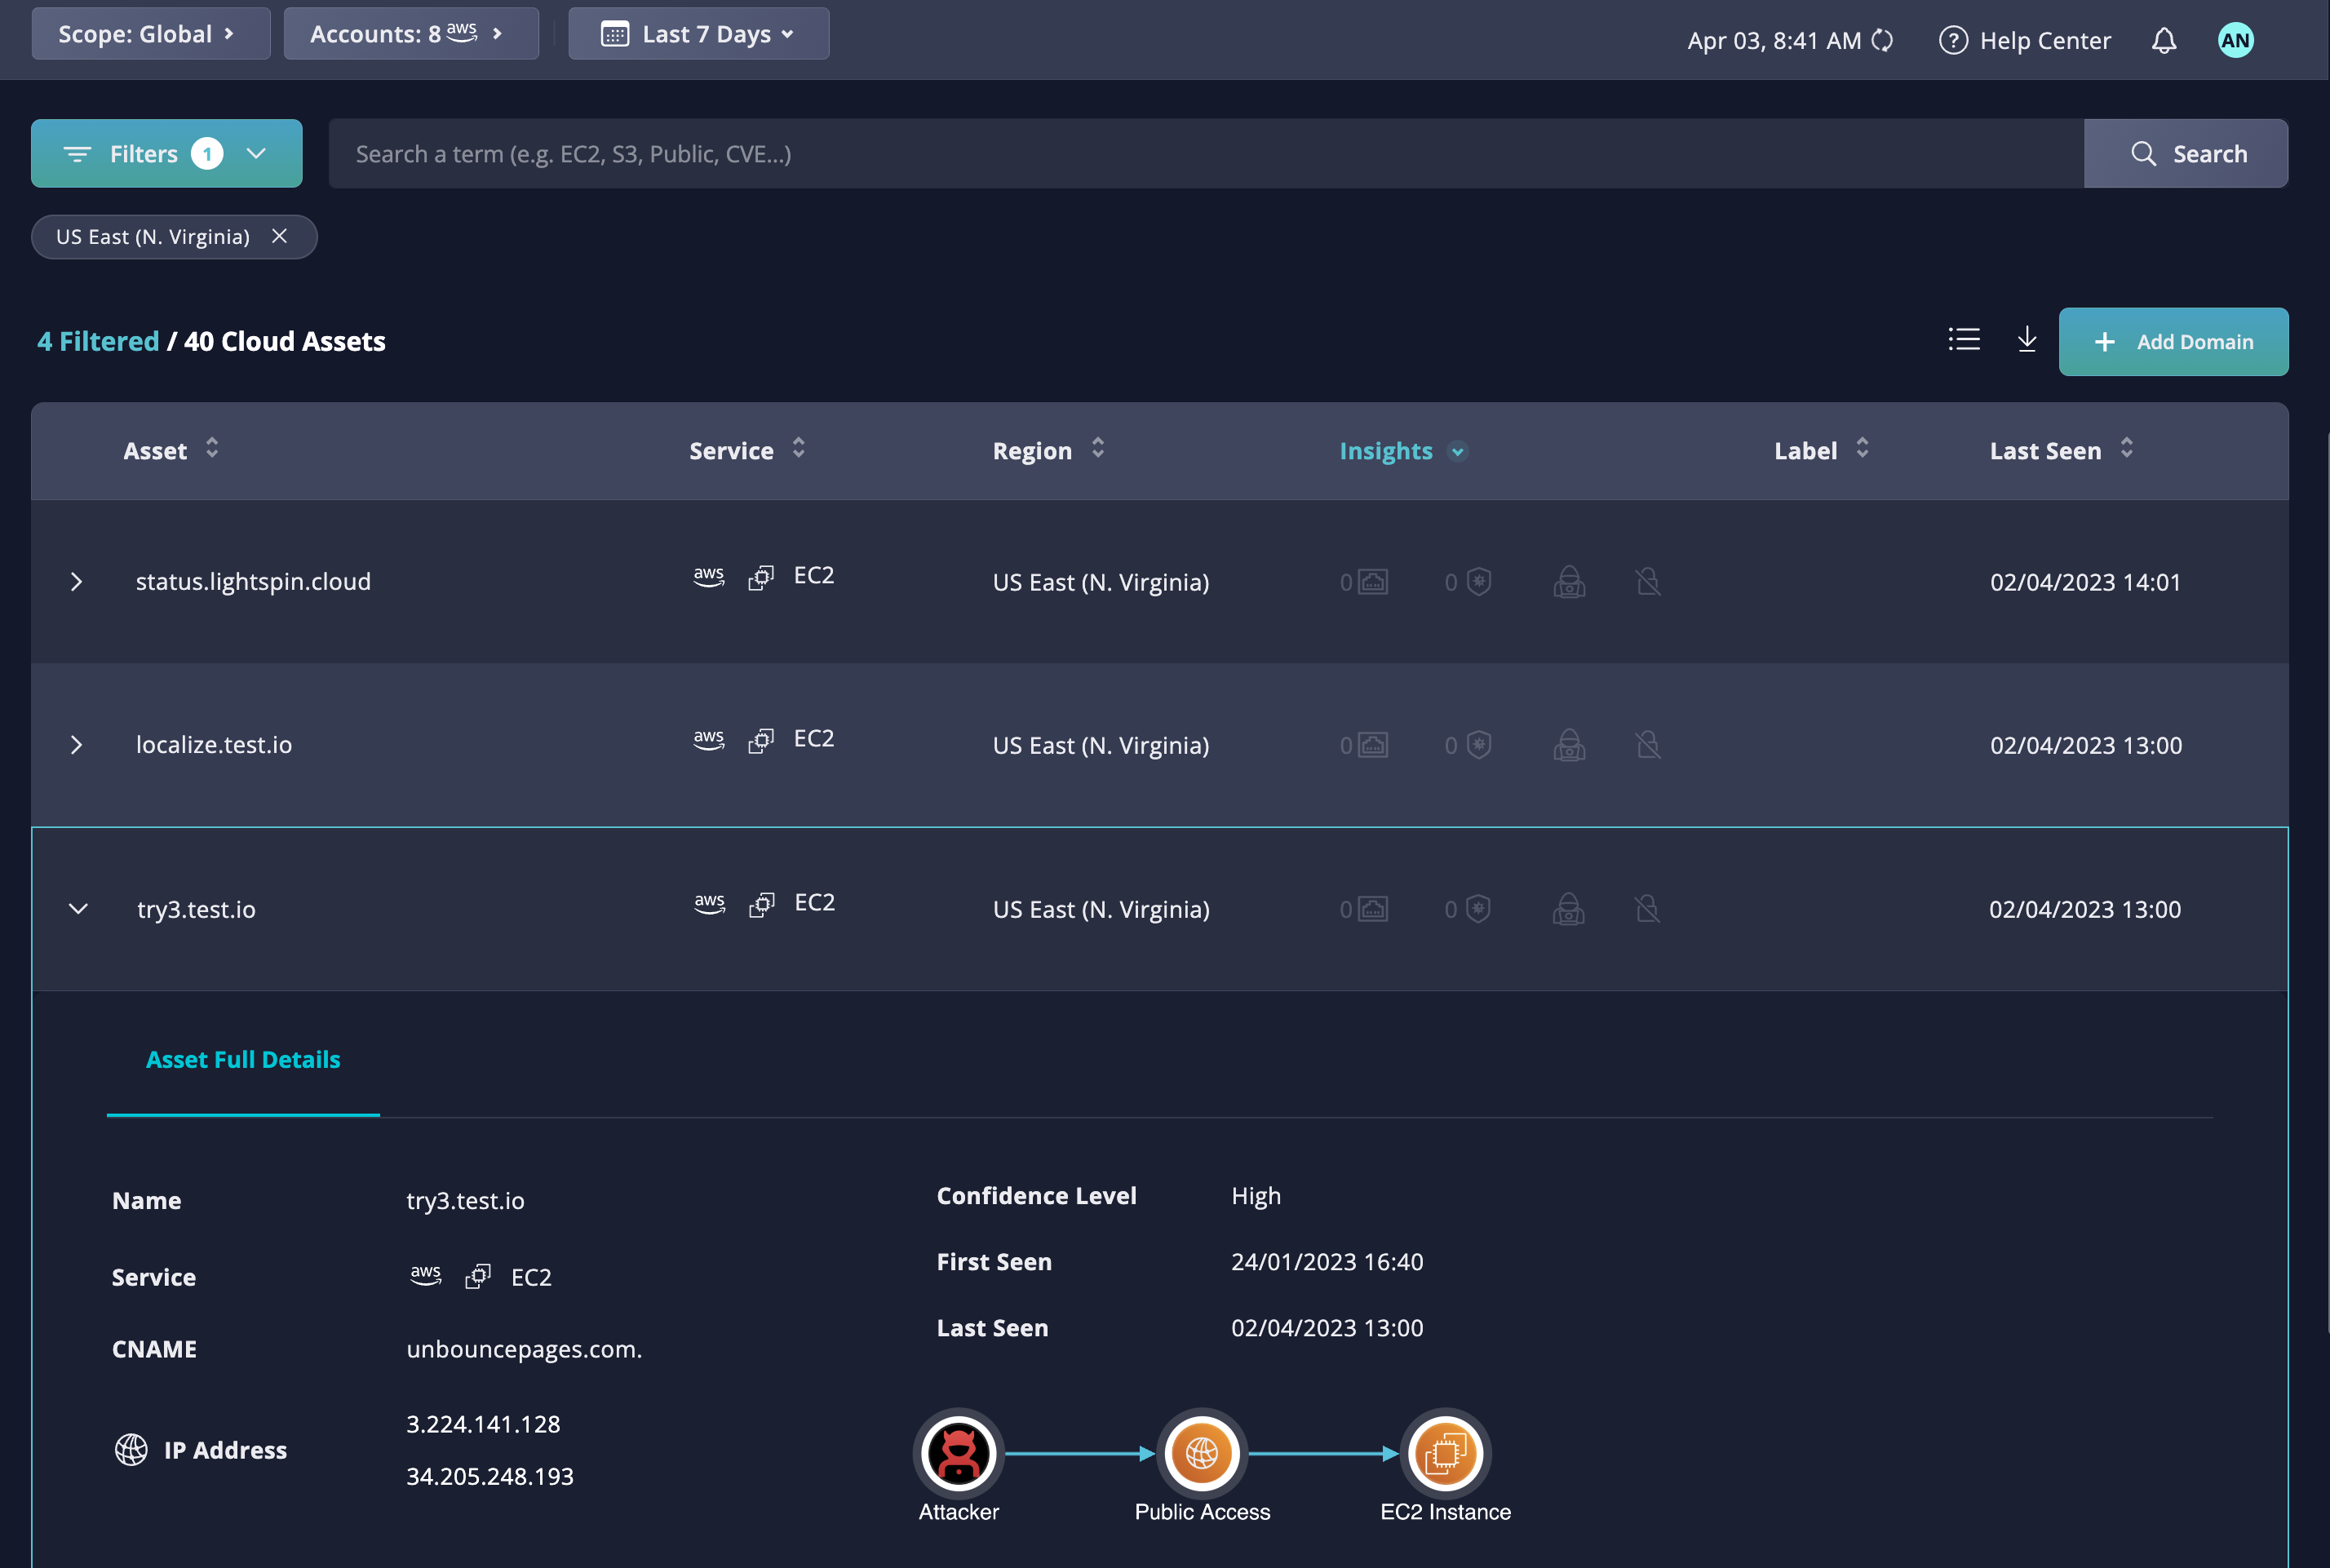
# 3 Review Domains assets with Public Access
Domain assets with public access present significant risks such as phishing attacks, DDoS attacks, and data breaches. Panoptica Attack Surface Discovery allows filtering by public access to focus the effort on the publicly accessible domains.
How-to:
- Scroll to the cloud asset table and filter by "Visibility" > "Public"
- Select a domain to review
- Copy the domain
- Review the available information and an attack path

Fig 3. Review Domain Assets with Public Access
# 4 Export the cloud asset table
Once desired filters are applied, you can download the table view in JSON or CSV to further review or process the data.
How-to:
- Click on the down arrow next to "Add domain assets"
- Choose a format and download
- Review the file
Fig 4. Downloading the table view in CSV or JSON
Updated 10 months ago