Accounts
The Accounts tab in Panoptica lists the cloud accounts and Kubernetes clusters you have connected to Panoptica.
Select Settings in the main navigation pane, then Accounts to reach the Accounts tab.
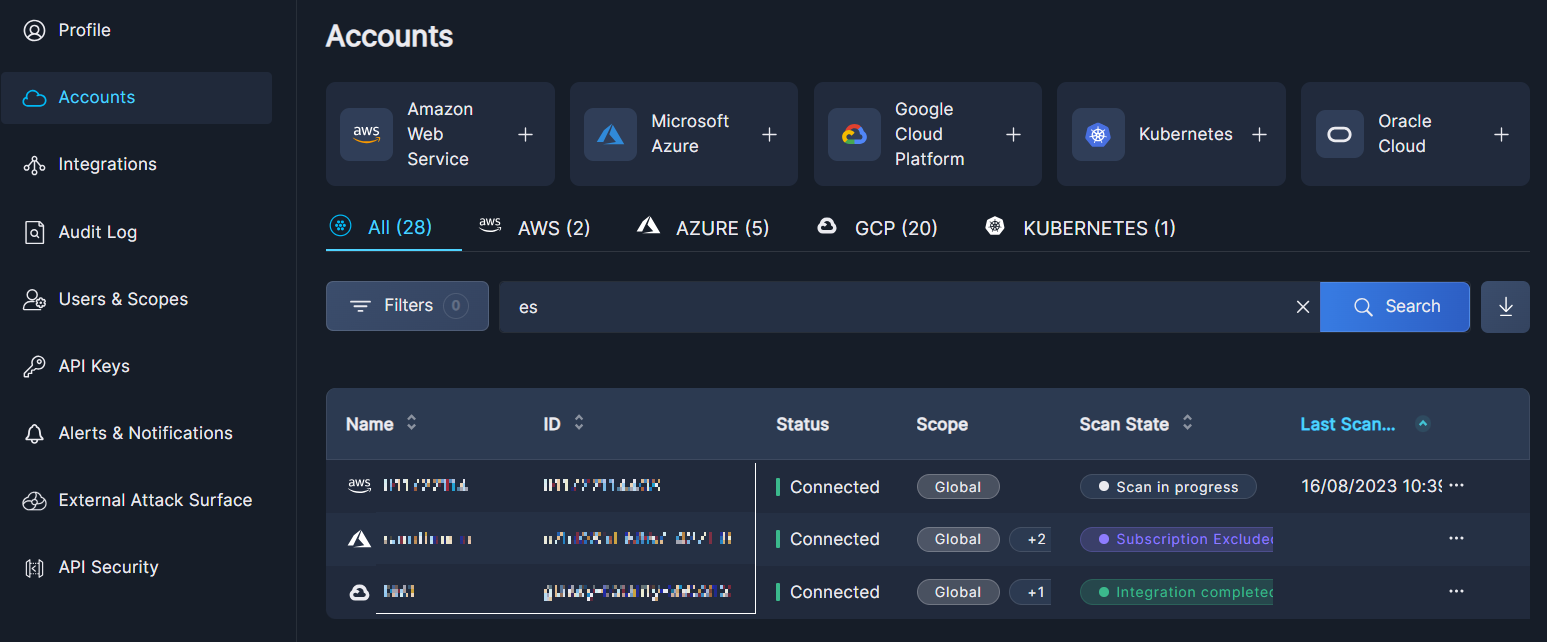
The default view displays All of the accounts that have been onboarded. Select one of the "quick filters"—AWS, Azure, GCP, Kubernetes, or OCI—to filter the results for one of those platforms. The number in parentheses indicates the number of accounts in each platform.
- Click the Filter button to narrow the list according to ID, Scope, Status, Provider and/or Scan State.
- Use the Search bar to look for all or part of an account name or ID.
To clear the search, delete any text in the field and click Search on an empty field.
Click the down arrow <↓> to download the list of accounts in CSV format. This is useful for record-keeping and for sharing this information with others.
In addition to Name and ID, the table provides the following information about each account:
- Status: Connected or Pending
- Scope: Global and/or Specific (see Scope Management)
- Scan State
- Last Scanned: date and time
Click the three dots (•••) at the end of each line to open a drop-down list of actions you can perform on that account or cluster.
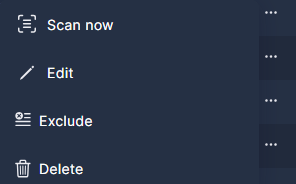
- To initiate an immediate scan, select Scan Now.
- To change details of the account, select Edit. The items that can be edited vary with they type of account.
- To stop scanning an account, without deleting it, select Exclude. This is useful for temporarily halting scans without offboarding the account, and for excluding certain auto-generated accounts from an organization, such as HR.
- To remove the account from Panoptica, select Delete.
If you have a lot of accounts, you can configure how many are displayed on each page, from 10 to 200 lines. This option appears at the bottom of the table.
Updated 10 months ago
What’s Next
To connect additional accounts to Panoptica, click the relevant buttons above the table: